

Stop, open every door and window, and put on nitrile gloves. A paint spill in your car demands three immediate actions: ventilate the cabin, contain the spill by pressing a clean microfiber towel firmly onto the paint and lifting straight up, and protect nearby surfaces with dry towels or plastic sheeting. Do not rub. Rubbing spreads pigment and drives it deeper into fibers, turning a manageable spill into a permanent stain.
Grab these items before you do anything else:
- Nitrile gloves (protect skin from solvents and wet paint)
- Several clean microfiber towels (folded into quarters for maximum clean surface area)
- A plastic scraper or old credit card (for containing the puddle edge)
- A sealable container or plastic bag (for saturated towels and waste paint)
- Mild dish soap and a spray bottle of clean water
According to detailing professionals, acting immediately and using press-and-lift blotting significantly reduces the risk of permanent staining. That window closes fast. Detailers call the first 60 minutes the Golden Hour, and every minute of delay allows paint to bond with fibers, foam, and coatings.
One quick insurance note: most personal auto policies cover interior damage only when it results from a covered peril such as a collision or vandalism. A paint can that tips over during transport is typically owner expense. Confirm your specific policy terms before assuming coverage.
Pro Tip: Press the towel down firmly, hold for two seconds, then lift straight up. Fold to a clean section after each lift. This technique lifts paint out of the fiber rather than spreading it laterally across the surface.
Key Takeaways
Acting within the Golden Hour with press-and-lift blotting, correct paint identification, and surface-matched cleaners gives you the best realistic chance of full removal without professional intervention.
| Point | Details |
|---|---|
| Act within the Golden Hour | Blot immediately with microfiber towels; detailing consensus puts permanent staining risk reduction above 70% with prompt action. |
| Blot, never rub | Press-and-lift removes paint from fibers; rubbing spreads pigment and pushes it deeper into padding. |
| Match cleaner to paint type | Water-based latex responds to soap and isopropyl alcohol; oil-based enamel requires mineral spirits or a dedicated remover. |
| Test solvents in a hidden area | Apply any cleaner under the seat or along a seam first to check for dye transfer or surface damage before treating the stain. |
| Know when to stop DIY | Two failed solvent rounds, dye transfer, or mildew odor are clear signals to call a professional detailer or consider replacement. |
| Smartliner-usa liners prevent the problem | Custom-fit cargo and floor liners contain spills on a hose-cleanable surface, eliminating the need for extraction or padding replacement. |
Table of Contents
- What to Do in the First Hour After a Paint Spill in Your Car
- How to Identify the Paint Type Before You Choose a Cleaner
- Surface-by-Surface Removal Methods for Every Interior Material
- Which Cleaners and Tools Are Safe to Use on Car Interiors
- Dried Paint: What Still Works and When to Accept the Limits
- When to Hire a Professional Detailer or Replace the Component
- How to Prevent a Paint Spill From Happening in the First Place
- A Detailer’s Honest Take on Paint Spill Priorities
- Smartliner-usa Liners: Practical Protection Before the Next Spill
- Sources
What to Do in the First Hour After a Paint Spill in Your Car
The first five minutes determine whether this is a one-hour cleanup or a $400 detailing bill. Professional detailers confirm that wet paint is a liquid you can lift; dried paint is a battle. Work through this sequence without skipping steps.
- Ventilate immediately. Open all doors and windows. If you used spray paint or oil-based enamel, the fumes are significant. Step out of the vehicle between blotting passes.
- Stage your tools. Lay out microfiber towels, your plastic scraper, dish soap, a spray bottle of water, and your waste container within arm’s reach before touching the spill.
- Contain the puddle edge. Use the plastic scraper to gently push the wet paint inward, preventing it from spreading to adjacent upholstery or carpet. Work from the outside of the spill toward the center.
- Blot the bulk. Press a folded microfiber towel onto the spill, hold, lift. Fold to a clean section. Repeat until no more paint transfers to the towel.
- Dilute carefully for water-based paint. Mist the stained area lightly with clean water, then blot again. Do not saturate. Over-wetting pushes paint into the foam backing and creates mildew risk.
- Apply mild dish soap. A small amount of dish soap on a damp towel can help lift the remaining latex residue. Dish soap works on very fresh water-based spills but leaves residue if not rinsed, so follow with a clean damp towel and a final dry blot.
- Extract moisture promptly. If you have a shop vacuum or upholstery extractor, run it over the area immediately after cleaning to pull moisture out of the padding.
Pro Tip: For large spills covering a seat and floor simultaneously, use a shop vacuum set to wet extraction before blotting. Hold the nozzle just above the paint surface to draw liquid up without pushing it deeper into the padding.
How to Identify the Paint Type Before You Choose a Cleaner
Matching the cleaner to the paint type is the single most important decision you make after the initial blot. The wrong solvent on the wrong paint can set the stain permanently or damage the surface underneath.
Run through this quick triage in 60–120 seconds:
- Look: Is the paint flat and water-thin, or thick and glossy? Latex/acrylic paints are usually flat or satin. Oil-based enamels tend to be glossier and thicker.
- Smell: A mild, low-odor smell suggests water-based latex. A strong chemical or mineral smell points to oil-based enamel or automotive paint.
- Texture: Wet latex feels slightly rubbery and lifts cleanly. Wet enamel feels oily and smears.
- Water drop test: Place a single drop of water on a small paint smear on a hard surface. If it beads and the paint stays intact, it is likely oil-based. If the water absorbs into the paint edge, it is water-based.
- Isopropyl alcohol dab: Dab a cotton swab with 70%+ isopropyl alcohol on a small paint smear. If the paint softens and transfers to the swab, it is latex. If it stays firm, you are dealing with enamel or cured automotive paint.
Once you know the type, the first-line cleaner is clear. Water-based latex responds to mild soap and water when fresh, and to isopropyl alcohol when partially dried. Oil-based enamel requires mineral spirits or a dedicated paint-safe interior remover. Acetone can dissolve both types but carries a high risk of damaging plastic trim, vinyl, and dyed fabric, so use it only as a last resort and always test on a hidden area first, such as under the seat or along a seam, before applying it to a visible surface.
Pro Tip: Keep the paint can or lid if you can find it. The product label tells you the base (latex, alkyd, enamel) and often lists the recommended cleanup solvent, which saves you the triage entirely.
Surface-by-Surface Removal Methods for Every Interior Material
Different materials tolerate different levels of mechanical and chemical intervention. Treat the most porous surfaces first, then move to hard trim last.
Fabric and carpet
Press-and-lift blotting removes the bulk of wet paint. For partially dried latex, apply isopropyl alcohol to a microfiber towel and press onto the stain for 30 seconds before lifting. Avoid scrubbing, which abrades the fiber weave. Use the least moisture possible and extract immediately. Persistent moisture in carpet padding causes mildew within 24–48 hours.
Leather and vinyl
Mechanical lifting first: use a plastic scraper to gently peel dried paint from the surface without pressing into the grain. For wet paint, blot with a dry microfiber, then follow with a leather-safe cleaner. Limit isopropyl alcohol contact time to under 30 seconds and condition the leather immediately after any solvent use. Scrubbing leather strips the dye layer and creates a permanent light patch.
Plastic trim and hard interior surfaces
A plastic scraper removes most dried paint without chemical help. For stubborn residue, isopropyl alcohol or mineral spirits on a microfiber towel works well. Test first on coated or matte-finish plastics, as some specialty coatings react poorly to solvents. For guidance on how coatings change cleaning approaches, matte surface care principles apply here too: test before committing to any solvent.
Glass
A razor blade held at a shallow angle (15–20 degrees) removes cured paint from glass without scratching. Work in one direction only. For fresh paint, a damp microfiber towel is usually enough.
Trunk and cargo areas
Remove any liners or mats first and treat them outside the vehicle where ventilation is better. If Smartliner-usa cargo liners are already in place, the paint is likely contained on the liner surface and can be rinsed off with a hose after removal.
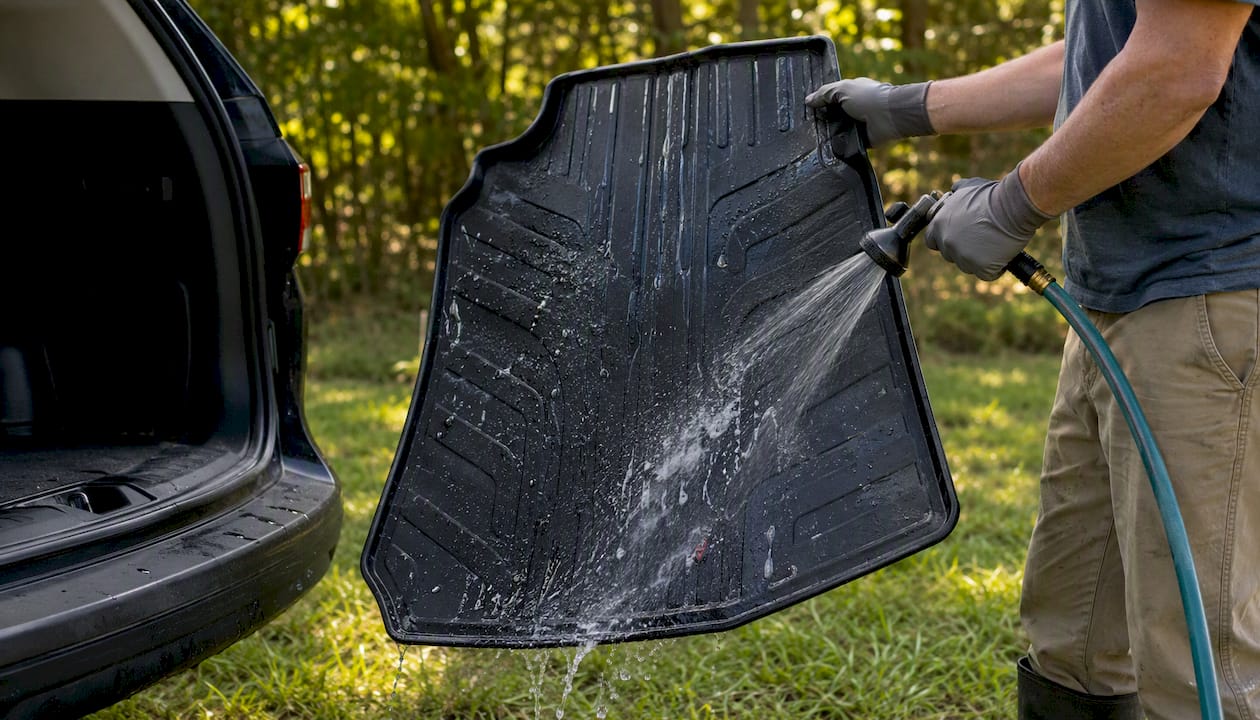
Pro Tip: When a spill covers mixed surfaces, treat the wet puddle on carpet or fabric first, then move to leather or vinyl, and finish with hard plastic trim. Porous materials absorb paint fastest and are hardest to restore once the paint cures.
Red flags that mean stop and call a professional: visible dye transfer from fabric to adjacent surfaces, fraying fibers after mechanical removal attempts, peeled or bubbled coatings on plastic trim, or any sign of mildew odor after cleaning.
Which Cleaners and Tools Are Safe to Use on Car Interiors
| Cleaner / Tool | Best Use | Key Caution |
|---|---|---|
| Mild dish soap + water | Fresh water-based latex on fabric | Rinse thoroughly; residue attracts dirt |
| Isopropyl alcohol (70%+) | Dried latex on fabric, vinyl, hard trim | Limit contact on leather; test first |
| Mineral spirits | Oil-based enamel on hard surfaces | Ventilate; avoid prolonged fabric contact |
| Dedicated upholstery cleaner | General fabric and carpet stains | Follow label dilution; extract after use |
| Acetone | Last resort on hard non-porous surfaces only | Damages vinyl, dyed fabric, and most plastics |
| Plastic scraper | Brittle dried paint on any surface | Use light pressure; never metal on soft surfaces |
| Microfiber towels | All surfaces, all stages | Fold frequently to expose clean sections |
| Upholstery extractor / shop vac | Post-cleaning moisture removal | Essential for carpet and padded seats |
| Nitrile gloves | All solvent work | Protect skin from chemical absorption |
Ventilation is non-negotiable when working with mineral spirits or acetone. Open all doors and take breaks outside the vehicle. Limit solvent dwell time to 30–60 seconds per application, then blot and rinse with a damp cloth to prevent the solvent from wicking deeper into padding.
Pro Tip: After any solvent application, follow with a mild soap-and-water rinse and a final extraction pass. Solvent residue left in upholstery attracts dirt and can cause sticky re-soiling within days.
Dried Paint: What Still Works and When to Accept the Limits
Once paint cures, the chemistry changes. Dried latex becomes a brittle resin that can often be cracked and lifted mechanically. Cured oil-based enamel stays flexible and bonded, which makes it far more resistant to removal.
The honest escalation path: Start with the gentlest method that could work. Move to the next level only after the previous one fails. Skipping steps to save time usually causes more damage than the paint itself.
Escalation flow for dried paint:
- Step 1 — Mechanical removal: Use a plastic scraper to gently crack and lift brittle dried latex. Community detailing experience consistently supports this as the safest first move for dried latex on fabric and hard surfaces.
- Step 2 — Solvent re-liquefaction: Apply isopropyl alcohol to dried latex on upholstery. Rubbing alcohol softens cured latex resin and allows careful lifting. For oil-based enamel, mineral spirits or a dedicated paint remover may soften the bond, though results vary.
- Step 3 — Professional detailer: If two solvent applications have not produced visible improvement, continued attempts risk fiber abrasion, dye stripping, or plastic crazing. A professional detailer with an industrial extractor and paint-specific chemistry is the next step.
- Step 4 — Component replacement: For large-volume spills on OEM leather, Alcantara, or deeply saturated carpet, replacement is often more cost-effective than repeated chemical treatment.
Never use heat to soften paint for removal. A hairdryer or heat gun permanently sets many paint types into fibers, making extraction impossible without replacing the component.
Damage risks by material: fabric weave abrasion from over-scrubbing, leather dye stripping from prolonged alcohol contact, plastic crazing from acetone, and mildew in foam backing from over-wetting.
When to Hire a Professional Detailer or Replace the Component
Some spills exceed what patient DIY work can fix. Knowing when to stop protects both the interior and your wallet.
Call a professional when:
- The spill volume is a quart or more and has soaked into seat foam or carpet padding
- The material is OEM leather, Alcantara, or another delicate specialty fabric
- Dye transfer is visible (paint pigment has stained adjacent surfaces)
- Mildew odor develops within 24 hours of cleaning
- Two rounds of appropriate solvent have produced no visible improvement
Cost context: Professional upholstery extraction and detail work for a paint spill typically runs $150–$400 depending on spill size and material. Seat reupholstery or replacement ranges from $200 to over $1,000 per seat for OEM-matched materials. Carpet replacement in a mid-size SUV can reach $500–$800 installed.
Pro Tip: Before visiting an estimator, photograph the stain from multiple angles, note the time of the incident, save the paint can label (paint type and cleanup solvent), and document every cleaning step you already took. This information helps the detailer choose the right chemistry and avoids redundant treatments that could worsen the damage.
On insurance: Auto insurance generally covers interior damage only when the cause is a covered peril, such as a collision, vandalism, or theft. A paint can that tips over during a home improvement run is a personal spill and typically falls to the owner. If the spill occurred during a covered accident, document it thoroughly and contact your insurer before attempting further DIY cleaning, since additional damage from cleaning attempts could complicate the claim.
How to Prevent a Paint Spill From Happening in the First Place
Prevention costs far less than cleanup. A few deliberate habits and the right protective products eliminate most of the risk before you ever start the engine.
Packing and transport habits:
- Seal paint cans tightly and place them upright in a plastic bin or crate with a lid
- Wrap each can in a plastic bag as a secondary containment layer
- Change out of paint-stained clothes before entering the cabin
- Place a moving blanket or drop cloth under any paint containers in the trunk
Protective products that contain spills before they reach upholstery:
- Floor liners: Custom-fit liners with raised perimeter edges contain liquid spills at the footwell level, preventing saturation of carpet and padding beneath.
- Cargo liners: A properly fitted cargo liner turns the trunk into a contained, hose-cleanable surface. Paint that spills onto a cargo liner stays on the liner.
- Seat covers: Removable seat covers protect fabric and leather during transport of messy materials.
- Under-sink cabinet mats (home-to-car transition): Smartliner-usa’s under-sink cabinet mats are designed for spill containment in tight spaces and work equally well lining a storage area or shelf where paint cans are staged before loading.
Smartliner-usa custom-fit floor liners are precision-formed to each vehicle’s floor contours, which means there are no gaps for liquid to reach the padding underneath. The raised lip design is specifically built for spill containment, not just dirt protection.
Pro Tip: A custom-fit cargo liner is the single most effective prevention tool for paint transport. When paint spills on a liner, cleanup takes minutes: remove the liner, rinse it with a hose, and reinstall. Without a liner, the same spill means hours of extraction work and a real risk of mildew in the foam backing.
A Detailer’s Honest Take on Paint Spill Priorities
The most expensive mistakes in paint spill cleanup are not the ones people make out of ignorance. They are the ones made in a panic.
Rubbing is the reflex. Every instinct says scrub harder. But pressing and lifting is what actually works, and the difference between those two actions is often the difference between a full recovery and a permanent stain. The second most common error is reaching for the strongest solvent available first. Acetone feels decisive. It is also the fastest way to crater a vinyl seat or cloud a plastic trim panel.
The Golden Hour framing is not marketing language. It reflects a real chemical reality: wet paint is a suspension that can be lifted; cured paint is a bonded resin that requires either mechanical disruption or chemical re-liquefaction, both of which carry damage risk. Speed matters more than the specific product you use in those first minutes.
Time management during the Golden Hour means doing the right things in the right order, not doing everything simultaneously. Contain the puddle edge first. Blot the bulk second. Identify the paint type third. Only then choose a cleaner. Skipping the identification step and guessing wrong costs more time than the 60-second triage takes.
The prevention angle deserves more credit than most cleanup guides give it. A quality cargo liner costs a fraction of a professional extraction, and it eliminates the problem entirely for the most common scenario: a paint can that shifts during a turn. That is not a theoretical benefit. It is a practical one.
Smartliner-usa Liners: Practical Protection Before the Next Spill
Cleaning up a paint spill is recoverable. Replacing saturated carpet padding or a stained leather seat is expensive. Smartliner-usa’s custom-fit floor liners and cargo liners give you a physical barrier between any spill and your vehicle’s interior materials.
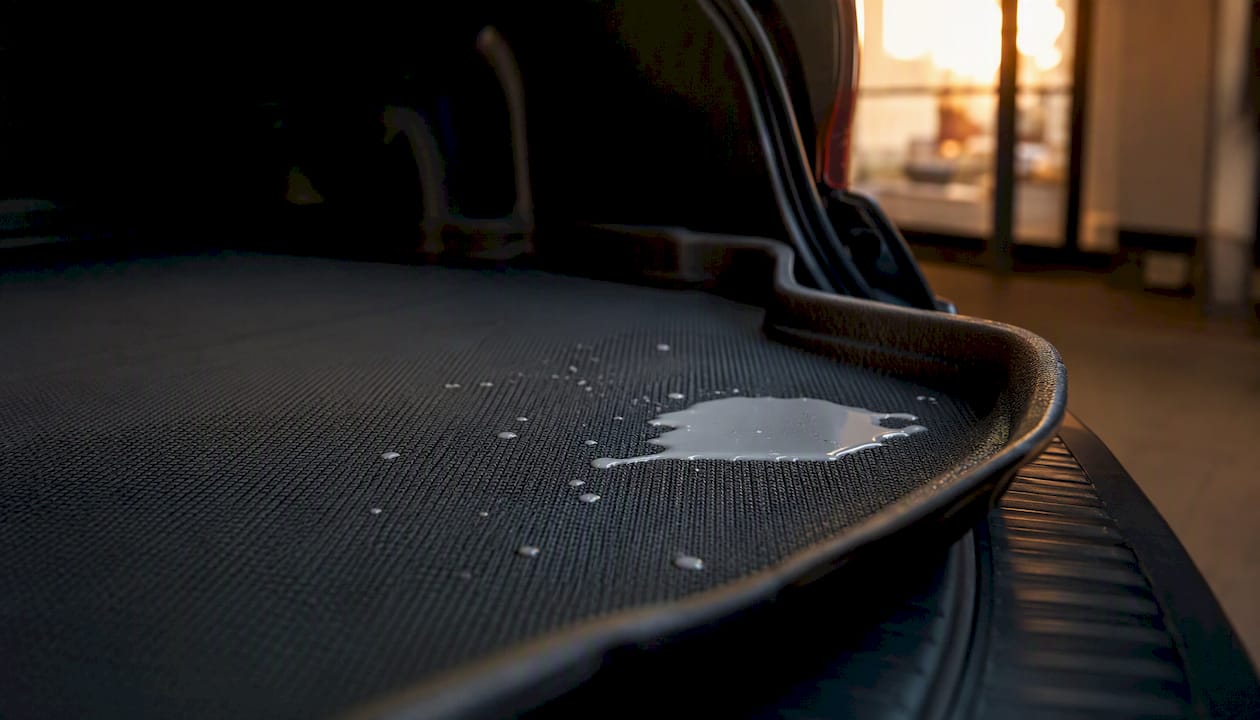
Every liner is precision-formed to fit specific vehicle models, including the 2009–2013 Subaru Forester and the 2014–2018 Subaru Forester, with raised perimeter edges that contain liquid before it reaches the foam beneath. For home use, the SMARTLINER HOME Under Sink Cabinet Mats offer the same containment logic in a compact format, available in 19.5" x 34.5" and 19.5" x 28.5" sizes.
Browse the full lineup at Smartliner-usa and find the liner built for your vehicle before the next trip with paint cans in the trunk.
Sources
- How to Remove Spilled Paint Inside Your Car – Complete Guide
- How Do You Remove Paint Stains from Car Seats, Carpets, and Interior Surfaces? - AutoDetailPedia
- How to Remove Latex Paint from Car Seat Fabric Safely | Stain Removal Guides
- Does Car Insurance Cover Interior Damage? What’s Covered vs Not
- How to Remove Paint from Inside Your Car | CarsBibles
- Help!!! Gallon of paint spilled inside the Car! (forum thread)