

Act fast: blot immediately, extract as much liquid as possible, then apply an enzyme cleaner or baking soda as an interim measure. Those three actions in the first 5–10 minutes are what separate a quick cleanup from a week of sour milk smell in your car.
Here is what to do right now:
- Grab paper towels or a microfiber cloth and blot firmly. Do not rub — rubbing spreads the spill and pushes milk deeper into the fibers.
- Lift any removable floor mats and take them outside to treat separately.
- If you have a wet/dry vacuum in reach, run it over the area immediately to pull liquid out before it soaks into the padding.
- Sprinkle baking soda generously over the wet area to absorb residual moisture and slow bacterial activity.
- Apply an enzyme cleaner if you have one on hand. If not, a diluted mild dish soap solution works as a short-term measure until you can get one.
Speed matters because milk contains proteins, sugars, and fats that begin feeding bacteria within minutes at room temperature. The longer it sits, the deeper it penetrates, and the harder the odor becomes to eliminate.
Key Takeaways
Blotting immediately, applying an enzyme cleaner, and extracting with a wet/dry vacuum are the three steps that determine whether a milk spill becomes a permanent odor problem.
| Point | Details |
|---|---|
| Act within 5–10 minutes | Blot, remove mats, and apply baking soda or enzyme cleaner before milk reaches the padding. |
| Enzyme cleaner is non-negotiable | Enzyme cleaners digest milk proteins and lactose; dish soap and vinegar alone cannot eliminate the odor source. |
| Extraction beats surface blotting | A wet/dry vacuum or portable extractor pulls dissolved proteins out of foam padding — wiping alone pushes them deeper. |
| Dry completely before assessing | Allow 24–48 hours of fan-assisted drying; a rebound smell after drying confirms the padding still needs treatment. |
| Smartliner-usa liners prevent recurrence | Custom-fit liners with raised lips stop liquid at the surface, eliminating the need for deep-cleaning cycles. |
Table of Contents
- Why does milk create such a stubborn sour smell in your car?
- What tools and cleaners do you need on hand?
- How to clean a fresh milk spill on car carpet (step by step)
- How to treat dried or old milk stains and persistent sour odors
- Why extraction and thorough drying are the decisive steps
- When should you call a professional detailer?
- Prevention matters more than most drivers realize
- Protect your car before the next spill happens
- Sources
Why does milk create such a stubborn sour smell in your car?
Milk is not just a liquid. It carries proteins (casein), lactose, and fat, all of which bacteria consume readily. As those bacteria metabolize the milk, they produce lactic acid and sulfur compounds — the source of that sharp, sour odor that seems to intensify days after the spill.
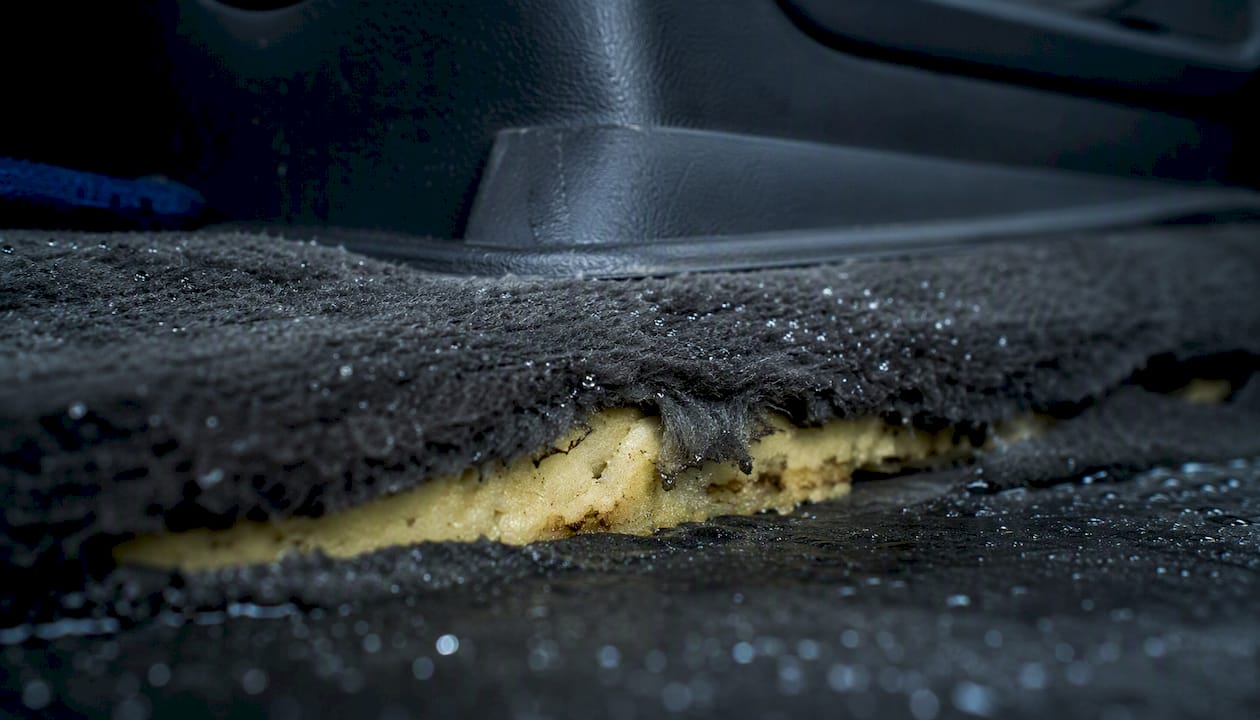
Car carpet compounds the problem. The fibers themselves hold moisture, but the foam padding underneath acts like a sponge. Once milk reaches that layer, surface cleaning rarely touches the actual source of the smell. The padding stays damp, bacteria keep multiplying, and the odor persists or returns.
Pro Tip: Spraying an air freshener over a milk spill is one of the worst things you can do. Professional detailers warn that masking odors hides a worsening bacterial and moisture problem — one that can progress to mold or mildew if the padding stays wet. Eliminate the source; don’t cover it.
Organic stains like milk share this same risk with other biological contaminants: moisture trapped under carpet creates ideal conditions for microbial growth. Understanding how moisture and contamination interact with car surfaces helps explain why thorough drying is non-negotiable.
What tools and cleaners do you need on hand?
Assembling the right kit before a spill happens — or sourcing these items quickly after one — makes a real difference in outcome.
Absorbents:
- Paper towels or old cotton towels for initial blotting
- Microfiber cloths for cleaning and final blotting (they lift residue rather than smear it)
Cleaning agents:
- Enzyme cleaner: the most important item for a milk spill. Enzyme-based products digest the proteins and lactose that cause odor, rather than simply masking them. Baking soda absorbs moisture and odor as an interim step, but enzyme cleaners address the root cause.
- Baking soda (sodium bicarbonate): inexpensive, effective for odor absorption and moisture control
- White vinegar diluted with water (1:1): a reasonable interim rinse that neutralizes some odors, though it does not break down proteins as thoroughly as enzyme cleaners
- Mild dish soap: useful for lifting surface residue in the initial rinse
Equipment:
- Wet/dry vacuum with an upholstery nozzle, or a portable carpet extractor such as the Bissell SpotClean
- Soft-bristled brush for gentle agitation
- Spray bottle for controlled application of cleaning solutions
- Box fan or high-output fan, plus a dehumidifier if available
Before applying any cleaner, test for colorfastness. Apply a small amount to an inconspicuous spot — under the seat or at the edge of the carpet — and wait a few minutes. Avoid bleach entirely; it can permanently discolor or degrade carpet fibers. Heat from a hair dryer or steam on a fresh spill can also set proteins into the fibers, making the stain harder to remove.
How to clean a fresh milk spill on car carpet (step by step)
Follow this sequence within the first two hours for the best result. The remove–rinse–sanitize flow is the standard best-practice approach used by detailing professionals.
- Blot, don’t rub. Press firmly with paper towels or a microfiber cloth. Work from the outside of the spill inward to avoid spreading it. Replace towels as they saturate.
- Remove floor mats. Take removable mats outside and treat them separately with the same enzyme-cleaner process. Lay them flat in sunlight and airflow to dry after cleaning.
- Extract with a wet/dry vac. Run the upholstery nozzle slowly over the affected area. This pulls liquid out of the padding rather than just the surface fibers. Do not skip this step if you have access to a vacuum.
- Apply mild soap solution. Mix a few drops of dish soap with cool water in a spray bottle. Mist the area lightly, agitate gently with a soft brush, then blot or extract again.
- Apply enzyme cleaner. Spray generously so the cleaner reaches the padding. Follow the product’s dwell time — typically 10–15 minutes. Enzyme cleaners need contact time to digest proteins.
- Extract again. Run the wet/dry vac or extractor over the area a second time to pull out the cleaning solution along with dissolved proteins.
- Rinse lightly. Mist with clean water, then extract once more. Avoid saturating the carpet; excess moisture prolongs drying and risks mold.
- Dry completely. Point a fan directly at the area. Open doors or windows to maximize airflow. In humid conditions, a dehumidifier placed inside the car speeds the process significantly.
Pro Tip: Detailing professionals emphasize that wiping without extraction pushes liquid deeper into foam padding. A wet/dry vac or portable extractor is what actually removes dissolved proteins and cleaning solution from the padding — surface blotting alone leaves residue behind that continues to feed bacteria.
How to treat dried or old milk stains and persistent sour odors
A spill that has been sitting for hours or days requires a more aggressive approach. The milk has likely reached the foam padding, and surface treatments will not resolve the smell.
Assess the situation first:
- Press a dry cloth firmly onto the carpet. If it comes away damp or discolored, the padding is still holding moisture.
- A persistent sour or musty smell after the carpet appears dry is a reliable sign that bacteria are active in the padding.
- If the spill was large-volume or the car sat closed in warm weather, assume padding contamination.
Repeat-treatment sequence for old spills:
- Dry-vacuum the area thoroughly to remove any dried residue on the surface fibers.
- Apply a generous layer of baking soda and let it sit for several hours (overnight if possible) to draw out residual moisture and odor.
- Vacuum up the baking soda completely.
- Saturate the area with enzyme cleaner, applying enough to reach the padding. Allow a dwell time of 20–30 minutes.
- Extract with a wet/dry vac or carpet extractor, working slowly to pull as much liquid as possible.
- Repeat the baking soda application and let dry fully before assessing.
If a spill soaked through carpet into the foam, surface cleaning often cannot eliminate the smell. Full disassembly or professional extraction is typically required at that stage. Experienced users and community detailing forums confirm that repeat treatments are common for padding contamination, and persistent cases usually mean the padding itself needs to be addressed.
For stubborn surface stains, a hydrogen peroxide spot treatment can help — but always test for colorfastness first, as it can lighten some carpet colors.
Allow at least 24–48 hours between treatment cycles before concluding the odor has been eliminated. Rushing the assessment while the carpet is still damp produces false negatives.
Why extraction and thorough drying are the decisive steps
Most DIY guides cover blotting and cleaning agents. Fewer emphasize what actually determines whether the odor returns: extraction and drying.
Foam padding is porous. Cleaning solution, dissolved proteins, and bacteria all migrate into it during a spill. Without suction to pull that material back out, it stays in the padding and continues producing odor as it dries. Professional detailers identify skipping extraction as the most common DIY mistake — wiping the surface simply relocates the problem downward.
The test for effective extraction: after the carpet has dried completely, press your palm firmly onto the treated area. No tacky residue and no rebound smell within 24 hours of drying indicates the extraction was thorough. If either appears, repeat the enzyme treatment and extraction cycle.
Equipment that makes a real difference:
- Wet/dry vacuum with an upholstery nozzle: the minimum effective tool
- Portable carpet extractor (such as the Bissell SpotClean): injects clean water and extracts simultaneously, reaching deeper into padding
- High-output box fans: place directly at the open car door, not just inside the cabin
- Dehumidifier: particularly useful in humid climates or when the car must stay closed
Practical warnings: avoid over-wetting the carpet during the rinse phase, as excess moisture extends drying time and risks mold. Keep the extractor nozzle away from door wiring harnesses and trim clips. Never use a heat gun or hair dryer on a fresh spill — heat sets milk proteins into fibers the same way cooking sets egg whites.
When should you call a professional detailer?
Some situations are beyond what DIY tools can resolve. Calling a professional is the right call when:
- The sour smell persists after two full cycles of enzyme treatment and wet/dry vacuum extraction
- The original spill was large-volume (a full bottle or more) and soaked through to the padding
- Visible mold or mildew is present on carpet fibers or under the mat
- The car has an existing moisture issue (a leaking door seal, a sunroof drain clog) that kept the area wet
- The smell has been present for more than a week without improvement
Professional detailers have access to truck-mounted hot-water extractors that generate far more suction than portable consumer units. For severe cases, they can remove carpet sections, replace foam padding, and apply ozone or thermal treatments that neutralize odor compounds at a molecular level. Ozone generators, in particular, are effective for odors embedded in surfaces that cannot be physically extracted.
When preparing for a professional appointment, remove personal items from the car and identify the exact spill location as precisely as possible. Ask the detailer specifically whether their process includes padding inspection and replacement if needed, and whether they offer any guarantee on odor elimination. Pricing varies by market and severity, but a full interior extraction and odor treatment typically runs between $100 and $300 at most independent detailing shops across the United States.
Prevention matters more than most drivers realize
Most drivers treat a milk spill as a one-time event. In practice, if it happened once, it will happen again — a child’s sippy cup, a grocery bag, a coffee lid that wasn’t fully closed. The cleanup process described here works, but it is time-consuming and not always fully successful once padding contamination sets in.
The honest reality is that repeated deep-cleaning cycles are hard on carpet fibers and foam padding over time. Each extraction removes a little more of the adhesive bond between layers. Each enzyme treatment, while necessary, adds moisture that must be fully dried to avoid compounding the problem.
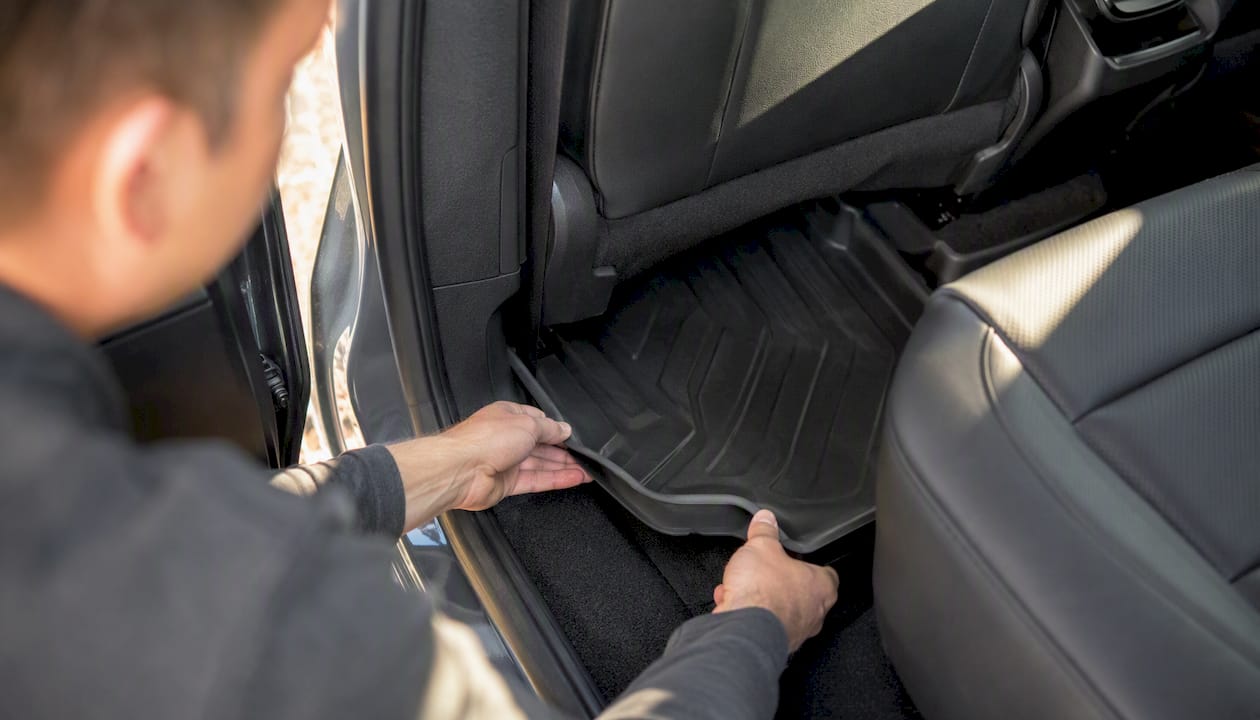
Prevention is the more durable solution. A custom-fit liner with raised containment lips stops liquid at the surface before it ever reaches the carpet. Cleanup becomes a matter of lifting the mat and rinsing it, rather than running an extractor for an hour and waiting two days for the padding to dry. That shift in effort is significant — and it protects the resale value of the vehicle in a way that repeated remediation cannot.
Protect your car before the next spill happens
A milk spill on car carpet is a solvable problem. A recurring one is a vehicle-condition issue. Smartliner-usa’s custom-fit, all-weather floor liners are built specifically to stop spills at the surface: raised containment lips hold liquid in place, non-porous materials prevent absorption, and the precise fit means no gaps where liquid can reach the carpet underneath.
Three features that matter most for spill protection: the raised lip design contains liquid rather than letting it spread, the non-porous surface wipes clean in seconds, and the custom fit eliminates the gaps that generic mats leave exposed. Liners are easy to remove, rinse off, and reinstall, making post-spill cleanup a two-minute task instead of a two-hour one.
Browse custom-fit floor liners for your vehicle at Smartliner-usa.com and find the precise fit for your car, truck, or SUV.
Sources
The following sources informed the steps, product guidance, and expert emphasis throughout this article:
- How to Remove Sour Milk Smell from Car Carpet & Seats
- Clean spilled drinks in car: carpet & upholstery
- How To Clean Spilled Milk Smell From Car Carpet: Quick Fix - My Sweety Cars
- How to Clean Spilled Milk from Car: Fast, Safe Steps - CleaningBro
- How to Clean Spilt Milk in Your Car | Simoniz