

Position the mat with its textured or non-slip side facing down, lock it onto the factory anchor posts if your vehicle has them, and secure every corner so nothing can shift. Then, before you drive anywhere, press the brake and accelerator to the floor twice each to confirm the mat never touches a pedal. If it has no factory anchors, heavy-duty non-slip backing or adhesive hook-and-loop fastened at all four corners is the next best option.
TL;DR:
- Factory anchor posts or clip retainers are the most reliable methods to secure mats, but if absent, heavy-duty hook-and-loop strips or carpet tape are necessary.
- Correct installation involves removing old mats, thoroughly cleaning the footwell, and running a full pedal test to ensure no movement or obstruction before driving.
- Trimming universal mats should only be done if the mat is specially rated for it, and the process must be careful to avoid obstructing pedals or damaging the material.
- Installing a full-pedal test before driving is critical to detect any shifting or interference caused by poorly fitted mats or improper placement.
- Custom-fit liners eliminate many common installation mistakes because they are molded for your vehicle’s exact dimensions, reducing the need for trimming or additional retention hardware.
Table of Contents
- How to Install Floor Mats Step by Step
- How Do You Secure Car Mats So They Don’t Slide?
- How Do You Trim a Universal Floor Mat for a Custom Fit?
- Why the Full-Pedal Test Matters Before You Drive
- Common Floor Mat Installation Mistakes and Fixes
- How Custom-Fit Liners Cut Installation Risk
- What Most Installation Guides Get Wrong
- Shop Custom-Fit Liners Built for Your Exact Footwell
- Where to Verify Manufacturer and Safety Guidance
- Sources
- FAQ
How to Install Floor Mats Step by Step
Correct floor mat installation follows five steps in a fixed order, and skipping any one of them is how mats end up bunched under a brake pedal at the worst possible moment. The step-by-step checklist most technicians follow starts with removal, not placement, because a clean footwell is what actually keeps a new mat anchored.
Step 1: Remove the old mats first
Pull out the existing mats before you do anything else, and shake or brush them off away from the car’s interior, not into it. Old carpet mats especially tend to release a small storm of dried mud, sand, and gravel the moment you lift them, and doing that cleanup inside the vehicle just moves the mess three inches to the left.
Step 2: Clean and vacuum the footwell
Vacuum the entire floor pan, then get into the seams, the pedal base, and the corners where the carpet meets the door sill. That trapped debris is exactly what stops a new mat from sitting flat, and a mat that rocks on hidden grit is a mat that will eventually slide. If the footwell has caked-on stains near the door jamb, a gentle cleaning method that won’t strip factory coatings works well before you lay anything new down.
Step 3: Identify the mat’s retention style
Flip the new mat over and look for grommets, molded clip sockets, or a nibbed rubber underside. This determines everything that follows. A mat built for factory anchor posts needs its grommets lined up with the posts in your footwell; a universal mat with only a non-slip underside needs a different backup plan, which the next section covers in detail.
Step 4: Position the mat correctly
Slide the mat in from the firewall side and work it forward, rather than dropping it flat and shoving it into place. The heel pad, the thicker molded or textured zone most mats include near the driver’s side, needs to land under the spot where your right heel naturally rests during normal pedal use. Off by even an inch, and you’ll feel the edge of the mat under your foot on every brake application.
Rear seat mats get positioned the same way, aligned to the seat track and the door sill, but pedal clearance isn’t a factor back there. Coverage of high-wear zones, like where rear passengers rest their feet, matters more than precise pedal geometry.
Step 5: Lock it down and confirm
If your vehicle has factory anchor posts, press the mat’s grommet straight down onto the post until it clicks or seats fully, then grab the mat and tug firmly in several directions. It should not lift off the post. For clip-style retainers, snap the clip into its mounting point and do the same tug test.
Pro Tip: Test-fit the mat over the anchor post before forcing the grommet down. Trying to muscle a misaligned grommet onto a post is how people tear the mat material or snap off a plastic factory post entirely.
A few things to check before you consider the job finished:
- The mat lies completely flat, with no wrinkling or bunching near the pedals.
- Every anchor point that exists on the mat is actually engaged, not just resting near the post.
- No edge of the mat extends far enough forward to reach the accelerator or brake pedal travel path.
- The mat sits on top of the carpet, not on top of another mat.
That last point sounds obvious until you realize how many vehicles on the road right now have a factory carpet mat still installed underneath an aftermarket all-weather mat, doubling the stack height and defeating the retention system entirely. Owner manual guidance on floor mat retention specifically warns against stacking mats for exactly this reason.
How Do You Secure Car Mats So They Don’t Slide?
Retention comes down to five real options, and which one applies depends entirely on what your mat and your vehicle were built with. Get this wrong and you’ll spend every winter re-adjusting a mat that keeps creeping toward the pedals.
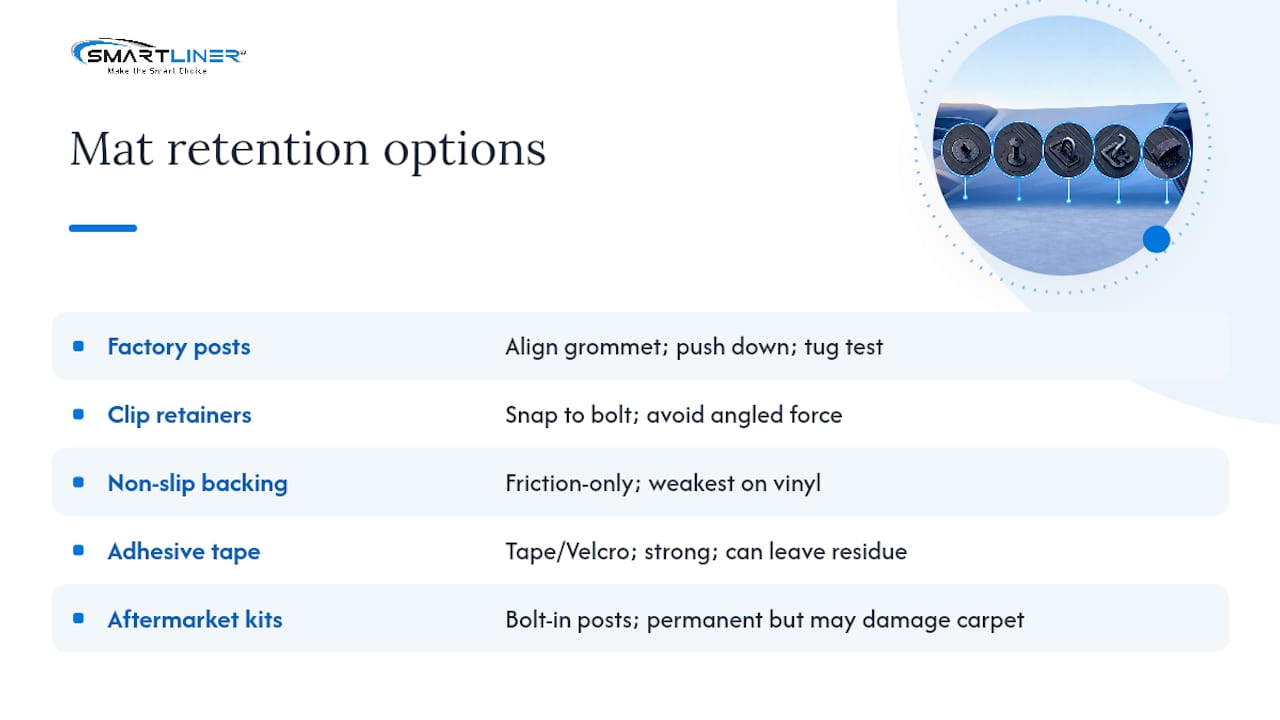
Factory anchor posts and grommets. Most vehicles built in the last two decades have small plastic or metal posts screwed into the carpet near the driver’s seat. Locate them, align the mat’s grommet holes directly over them, and push straight down until you feel or hear the seat click into place. Always finish with a firm tug test in multiple directions before you trust it.
Clip-style retainers. These snap-on clips mount to an existing bolt or bracket point and hold the mat’s edge or grommet in a fixed position. Line the clip up with the mat’s molded socket and press until it seats, taking care not to force it at an angle, which is the most common way people crack the plastic housing.
Non-slip backing and nibbed undersides. A mat with a textured rubber or nibbed underside relies on friction alone, no mechanical lock. This works reasonably well on carpeted floor pans in mild climates, but it’s the weakest option on vinyl flooring or in vehicles that see a lot of stop-and-go driving. Test it yourself: if you can slide the mat forward with light foot pressure, it’s not adequate on its own.
Adhesive hook-and-loop and carpet tape. For vehicles without factory anchors, double-sided carpet tape and heavy-duty hook-and-loop strips placed at all four corners add real holding power. Clean the carpet surface first, apply the adhesive strip, and give it the manufacturer’s recommended cure time, often a few hours, before putting weight on it. The tradeoff is potential adhesive residue if you ever remove the mat, so this suits mats you plan to keep long term rather than ones you’ll swap seasonally.
Aftermarket anchor kits. These bolt a new post into the factory carpet where none existed. They’re a more permanent fix, but installing one incorrectly can tear the carpet or leave a permanent hole if you later switch to a different mat style. Reserve anchor kits for situations where adhesive and non-slip backing have both failed, and choose a kit rated for your specific vehicle rather than a generic universal bracket.
Pro Tip: Adhesive fixes and non-slip backing are backup measures, not primary retention. If a mat is designed for anchor posts, use the posts. Reach for tape or hook-and-loop only when no factory retention point exists at all.
How Do You Trim a Universal Floor Mat for a Custom Fit?
Trimming only applies to universal, all-weather mats that were never engineered with anchor points for your specific vehicle. If your mat came with grommets meant to match factory posts, cutting into it voids that fit and can create a floating edge that curls up right into pedal territory.
- Confirm the mat is trim-rated. Look for built-in trim guides, usually a series of raised lines or dashes molded into the underside near the edges. If there are none, and the mat wasn’t marketed as trimmable, don’t cut it.
- Mark the excess while the mat is outside the vehicle. Set the mat on a flat surface, place it against a reference edge, and mark your cut line with chalk or a dry-erase marker rather than eyeballing it inside the cramped footwell.
- Cut with sharp scissors or a utility knife, in shallow passes. Thick TPE or rubber mats resist a single deep cut and are far easier to control with two or three light passes than one aggressive one. Stay conservative around the heel pad zone; that area needs to remain intact.
- Test-fit, then trim again if needed. Set the trimmed mat back in the footwell, check the edges against the door sill and center console, and remove it again for a second round of trimming if it’s still tight anywhere. Never trim a mat while it’s sitting in the vehicle. A slipped blade near carpet, wiring, or your own hand is not a risk worth taking for a faster fit.
Trimming is a one-way process, so the general rule for material this permanent is to remove less than you think you need to, check the fit, and repeat. A mat trimmed too aggressively on the first pass can’t be un-cut.
Why the Full-Pedal Test Matters Before You Drive
The single verification step that actually catches a bad installation is a full-stroke press of the accelerator and brake, done twice each, while you watch the mat’s edge for any lift, bunch, or shift toward the pedal. This isn’t optional caution. OEM and NHTSA-related safety guidance specifically flags floor mats as a documented cause of pedal interference, and in some reported cases, an improperly seated mat depressing the accelerator has triggered unusual driveability symptoms severe enough to require a technical bulletin.
Run the test with the engine off first, then again with the engine running and the vehicle in park. Watch specifically for:
- The mat edge lifting or curling as the pedal reaches full travel.
- Any resistance in the pedal’s return spring action caused by mat contact.
- Movement of the mat itself, even slight, toward the pedal box.
If you see any of that, stop. Reposition the mat, re-engage every anchor or clip, and run the test again from the beginning. If it moves a second time, the mat’s backing or retention style is not adequate for that vehicle, and a stiffer or custom-fit liner is the safer long-term answer, not another layer of tape.
Repeat the full-pedal check after every deep clean, after seasonal mat swaps, and after any temperature swing severe enough to stiffen or soften rubber backing. Your owner’s manual retention guidance usually specifies which retainer type your vehicle was designed for. Follow that spec over generic advice.
Common Floor Mat Installation Mistakes and Fixes
Most installation failures trace back to one of four repeat offenders, and every one of them is fixable in under five minutes once you know what to look for.
- Upside-down mats. The smooth, finished side faces down and the textured or nibbed grip side faces up. Flip it. This single mistake accounts for a surprising share of “my mat won’t stay put” complaints.
- Debris trapped underneath. A pebble or clump of dried mud under the mat creates a pivot point that rocks the whole thing loose over time. Pull the mat, clean the floor pan again, and reinstall.
- Mismatched grommets. Aftermarket or universal mats sometimes have grommet spacing that doesn’t quite match your factory posts. Forcing it on anyway strains the material and can eventually tear it. If the holes don’t align cleanly, that mat isn’t the right one for your vehicle.
- Stacked mats. A new mat installed directly over an old one defeats the retention system underneath and adds enough height to change pedal clearance. Remove the old mat completely before installing anything new.
A mat that keeps deforming, curling at the edges, or creeping forward no matter how many times you re-secure it has reached the end of its useful life. At that point, a stiffer, custom-fit liner is a better investment than another round of tape.
Pro Tip: If you ever feel pedal resistance that wasn’t there before, stop the vehicle, remove the mat entirely, and retest the pedal with no mat installed at all before deciding what fixed it.
If a mat has torn near an anchor point, if a factory post has snapped off, or if you notice a recall notice tied to your specific make and model, that’s a job for a dealer service department rather than a DIY fix.
How Custom-Fit Liners Cut Installation Risk
Most installation mistakes trace back to a mismatch between the mat and the vehicle, not user error. A universal mat that needs trimming, taping, and constant readjustment is working against you from the first step. Custom-fit liners are molded to a specific vehicle’s footwell contours, which means the heel pad, the anchor points, and the pedal clearance are already correct before you take the liner out of the box.
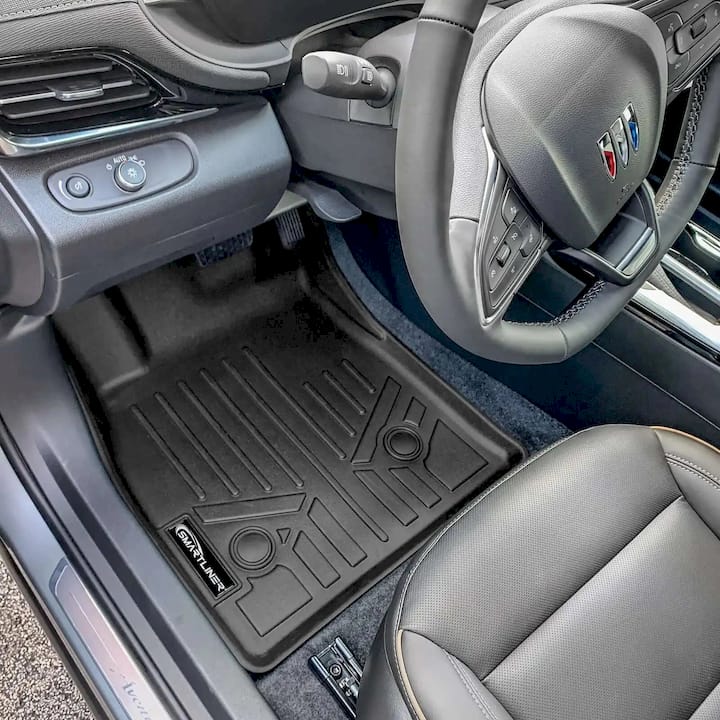
That precision removes two of the biggest risk factors covered above: it eliminates the need to cut material near the heel zone, and it removes the guesswork of adding an aftermarket anchor kit. When you’re shopping, check that the liner is listed for your exact model year, confirm heel pad placement matches your factory floor pan, and verify the grommet spacing matches your vehicle’s retention posts rather than a generic layout. A second-row bench seat liner needs the same fit check for rear coverage. Buyers unsure about which retention style their vehicle uses can reach Smartliner-usa customer support directly for model-specific guidance before ordering.
What Most Installation Guides Get Wrong
Most floor mat guides treat the pedal test as an afterthought, a quick mention buried at the bottom after three paragraphs about cleaning technique. That ordering is backwards. The pedal test is the only step that actually confirms safety, and it deserves the same weight as the anchor step itself, not a footnote.
The bigger blind spot is how much DIY advice leans on adhesive fixes as a first resort rather than a backup. Tape and hook-and-loop strips have their place, but they’re compensating for a mat that doesn’t fit the vehicle correctly in the first place. A universal mat trimmed and taped into position can pass a pedal test today and still creep by winter, once cold temperatures stiffen the backing and change how it grips carpet fiber.
What actually reduces risk long term is matching the retention style to the mat before installation, not after something starts sliding. Readers who keep re-securing the same mat every few months are usually fighting a fit problem, not a technique problem. A liner built for the exact footwell removes that fight entirely.
— Marty
Shop Custom-Fit Liners Built for Your Exact Footwell
Custom-fit floor liners are an alternative to universal mats that require trimming and taping: these liners are molded to a specific model year, so the anchor points, heel pad, and pedal clearance are already right the first time you set them in. That precision matters most in the exact spots this guide covers, tight door sills, factory retention posts, and the pedal box itself, because a liner built for your floor pan doesn’t need aftermarket anchor kits or adhesive workarounds to stay put.
Before you order, confirm your vehicle’s year and model, and check that the listing matches your factory grommet spacing. Browse SMARTLINER Floor Liners for the full lineup, check fit for a Mazda 3 sedan, or find coverage for an Armada, QX56, or QX80. If you’re unsure which retention style your vehicle needs, consider contacting customer support for guidance before purchasing, rather than after a mat starts sliding.
Where to Verify Manufacturer and Safety Guidance
Trust the vehicle-specific source over generic advice whenever the two disagree. A few references worth bookmarking:
- Your vehicle’s owner manual floor mat guidance for the exact retainer type your model was designed to use.
- The OEM/NHTSA bulletin on floor mat safety for documented pedal interference risks and recall context.
- A detailed step-by-step installation walkthrough for the full cleaning-to-testing sequence.
- Practical retention and anti-slip fixes for vehicles without factory anchor posts.
Sources
- How To Install Car Floor Mats Correctly (Step-by-Step)
- Information on Proper Use of Floor Mats (OEM/NHTSA bulletin)
- Driving Hints - Floor Mats (Owner manual content)
- 3 Easy Ways to Keep Car Mats in Place - wikiHow
FAQ
How do I keep car floor mats from sliding around?
Use your vehicle’s factory anchor posts or clip retainers first; if none exist, add heavy-duty hook-and-loop strips or double-sided carpet tape at all four corners after cleaning the carpet surface.
What are the general instructions for installing all-weather floor mats?
Remove the old mats, clean and vacuum the footwell, place the new mat textured side down starting from the firewall, secure every retention point, then run a full-pedal test before driving.
How do I install floor mat clips?
Line the clip up with the mat’s molded socket or grommet, press straight down until it seats fully, and confirm it’s locked with a firm tug in multiple directions.
Is it hard to install custom-fit floor liners?
No. Custom-fit liners like Smartliner-usa’s are molded to match factory anchor points and heel pad placement, so most drivers can install one in a few minutes without any trimming or extra hardware.
How often should I redo the full-pedal test?
Run it after every deep clean, after swapping in seasonal mats, and after any major temperature swing that could stiffen or soften the mat’s backing material.